

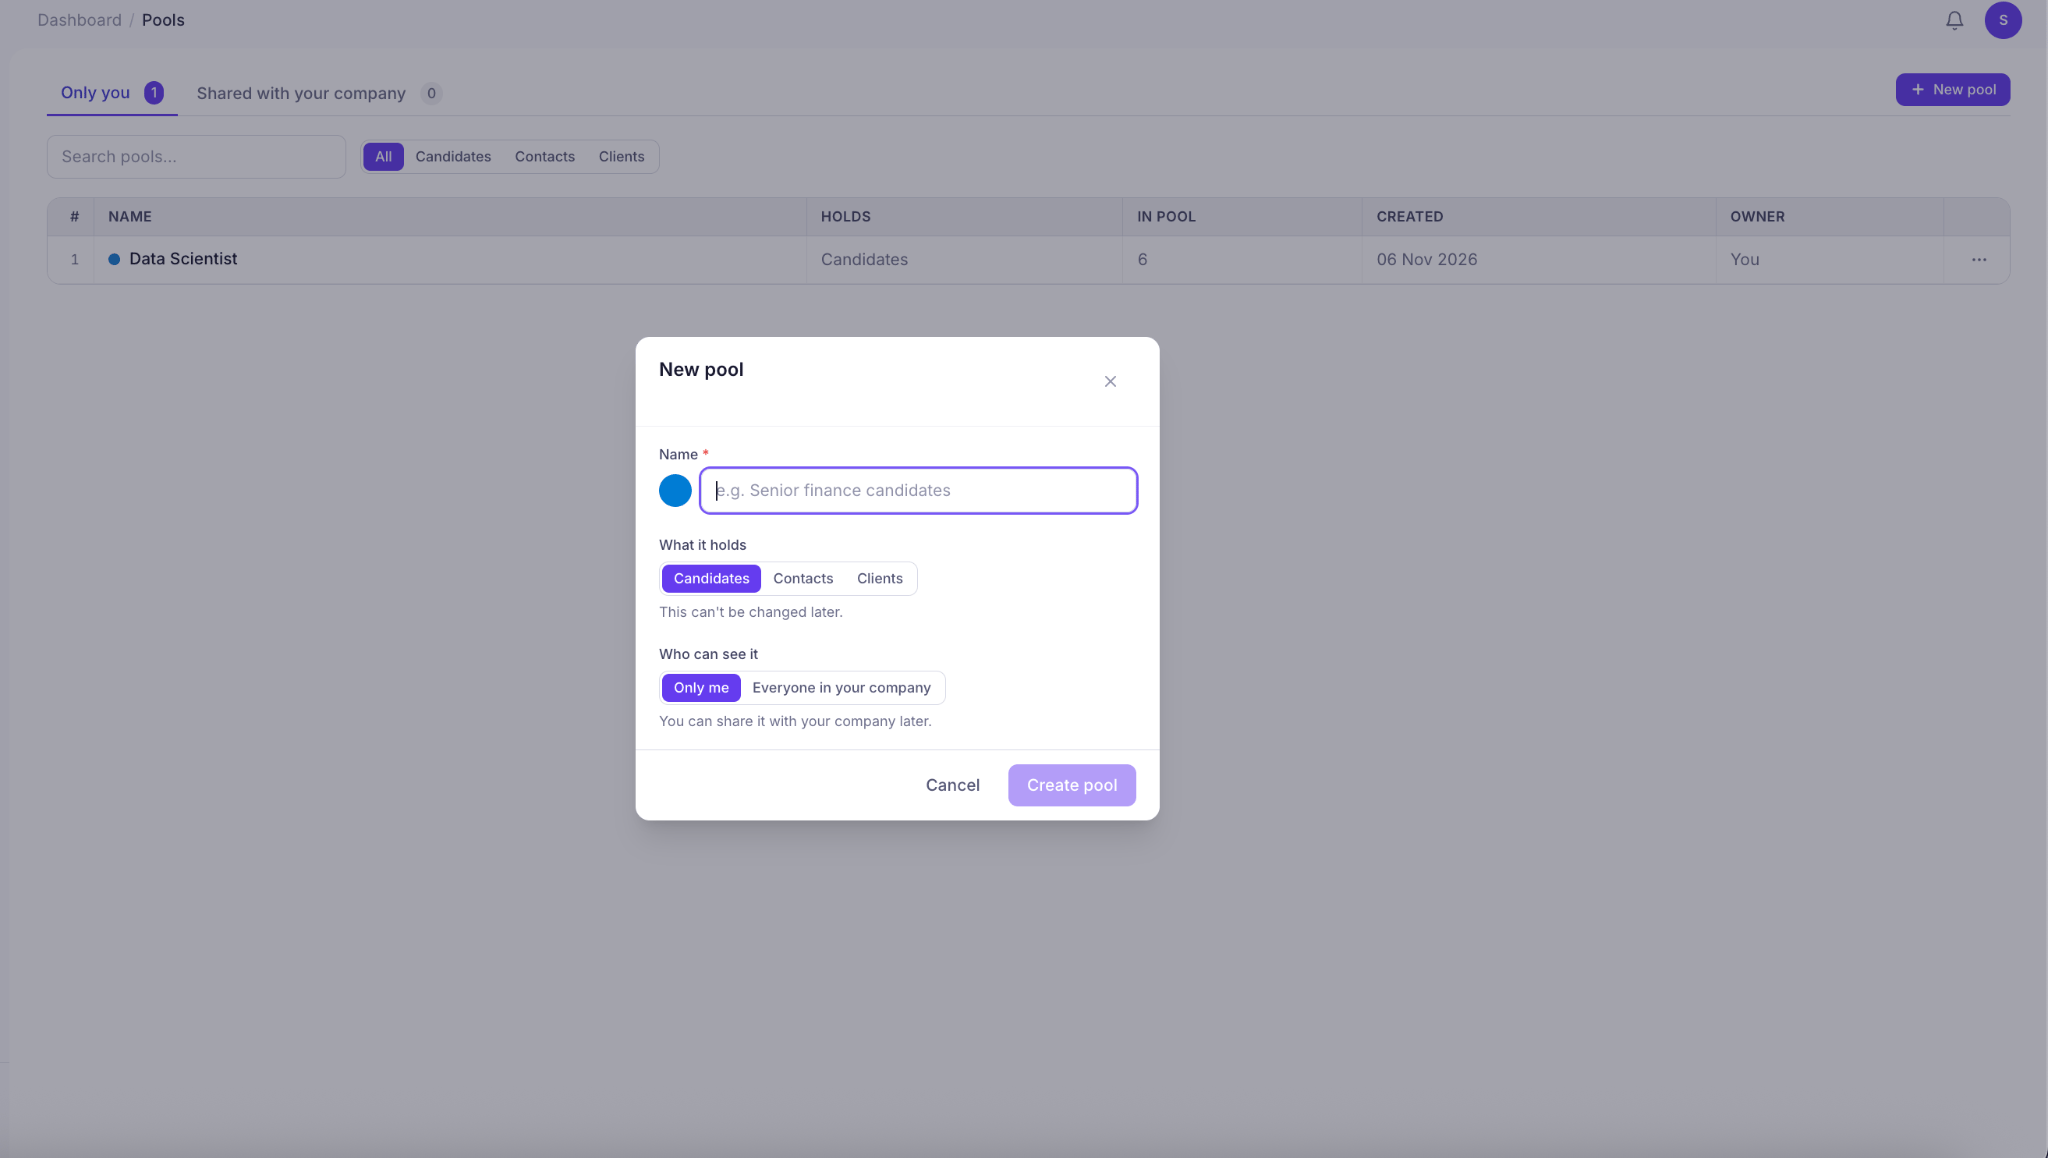
View Your Pools
- Navigate to Pools from the left sidebar under ATS.
- Browse your existing pools in the table.
- Switch between Only You and Shared with Your Company to view private or shared pools.
- Use the search bar to find a specific pool, or filter by Candidates, Contacts, or Clients.
- Click a pool’s name to open it.
| Column | Description |
|---|---|
| Name | The name of the pool. |
| Holds | The type of records stored in the pool: Candidates, Contacts, or Clients. |
| In Pool | The number of records currently in the pool. |
| Created | The date the pool was created. |
| Owner | The person who owns the pool. |
Create a New Pool
- Navigate to Pools from the left sidebar.
- Click + New Pool in the top-right corner.
- Enter a name for your pool, such as “Senior Finance Candidates.”
- Under What It Holds, select the type of records you want to organize.
- Choose who can see the pool.
- Click Create Pool to save it.
Choose What Your Pool Holds
When creating a pool, select one of the following record types:- Candidates: Group candidates based on skills, experience, job roles, or future hiring opportunities.
- Contacts: Organize contacts into dedicated lists for easier relationship management.
- Clients: Group clients by industry, market, or other relevant criteria.
Set Pool Visibility
Choose who can access your pool when creating it.- Only Me: Keep the pool private and visible only to you.
- Everyone in Your Company: Share the pool with your company so other team members can access it.